
Category: Beauty

The Smart Person’s Guide to Coloring Your Hair at Home (Without Wrecking It)

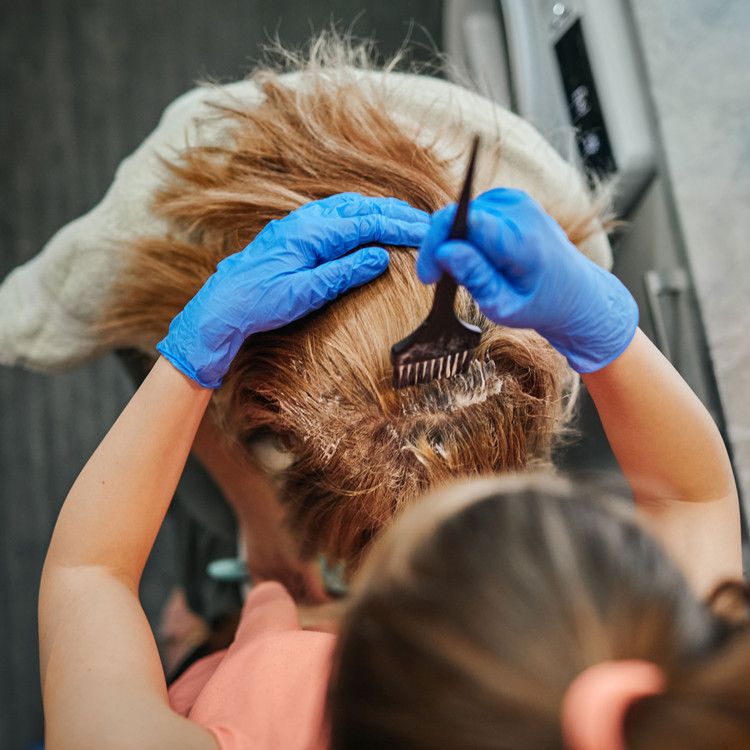
There’s a version of you that’s completely comfortable DIY-ing most things. You’ll repaint a room, assemble flat-pack furniture, attempt a soufflé. But hair color has always been that one thing you handed off to a professional — because the consequences of getting it wrong live on your head, visible, for weeks. Except now you’re staring at a box of dye at the drugstore, and it doesn’t seem that complicated. It isn’t — with the right preparation. But it also isn’t as forgiving as the box might suggest. Here’s everything you need to know before you open that box. Before Anything Else: Talk to a Colorist This advice sounds counterintuitive in a DIY guide, but it’s the most valuable thing in it. Before you buy a single product, consider reaching out to your usual colorist — or any colorist — for a quick digital consultation. Most are open to it, especially for a paying client. Why? Because the biggest at-home hair color mistakes happen before the product even touches your hair. A professional can tell you which formula is right for your hair type, which shade will actually work with your undertone, and whether what you’re trying to do is even achievable without salon equipment. Ten minutes of expert input can save you three weeks of hat-wearing. If a consultation isn’t possible, the rest of this guide will get you through it. Step One: Choose the Right Type of Color The first decision — permanent vs. semi-permanent — matters more than the shade itself. Semi-permanent contains no bleach, no ammonia. It deposits color on top of your hair rather than penetrating the shaft, which means it fades gradually over 4–6 weeks and won’t cause lasting damage. It’s the safer, gentler choice, especially if you’re new to this or working with hair that’s already been chemically treated. Permanent also contains no bleach, but it does open the hair cuticle to deposit color that won’t wash out. It’s more effective for covering grays fully and for significant color changes — but it’s also more committing and more taxing on your strands. A note on ingredients: look for formulas that are free of both ammonia and PPD (paraphenylenediamine). Ammonia is harsh on the hair shaft; PPD is the most common allergen in hair dye. Plenty of modern formulas skip both without sacrificing effectiveness. And regardless of which product you choose: do the allergy patch test 24 hours before coloring. Every time. Even if you’ve used the same brand before. Sensitivities develop over time. What Are You Actually Trying to Do? The approach changes significantly depending on your goal. Here’s how to think through each scenario. Covering Grays Your main task here is accurate color matching — and the most common mistake is matching the wrong thing. Don’t match to an old photo of your hair, or to how you remember your color looking. Instead, look at the hair at the nape of your neck, where sun exposure is minimal and the color is closest to your natural, unaffected base. Better still: part your hair straight back from crown to nape, clip both sides out of the way, and photograph the center section in natural light. That image will give you a much more accurate read on your true base color than anything else. One important caveat: root touch-up products are formulated specifically for the regrowth zone. They’re not designed to cover the length of your hair. If you want an all-over color refresh, that’s a different product and a different process. Changing Your Whole Color Here you’re picking a new shade rather than matching an existing one, which means navigating two variables: shade and tone. Shade is simply how light or dark the color is. The consistent trap people fall into is going too dark — dark shades applied at home tend to look flat and one-dimensional compared to what a salon achieves with depth and dimension. If you’re between two shades, go half a step lighter than your instinct. If you want something close to black, choose a deep espresso brown instead. It’ll read more naturally in real light. Tone is the warm-cool spectrum within any shade — and this is where the nuance lives. In general, cool-toned people look best with cooler hair colors, and warm-toned people with warmer ones. To find your undertone, look at the veins on the inside of your wrist in natural light: blue veins suggest cool undertones, green suggests warm, and a mix of both means you’re neutral (in which case, most tones will work for you). The shade name will usually signal its tone if you know what to look for. Cool blondes are described as icy, ashy, or platinum. Warm blondes are golden, honey, or wheat. Cool brunettes lean smoky or mocha; warm brunettes tend toward chestnut, auburn, or caramel. What About Going Lighter? Short answer: be careful. If your goal is significantly lighter hair — actual blonde on a dark base — you need bleach. A blonde box dye on dark hair without bleach won’t give you blonde. It’ll give you orange, possibly uneven orange, and it won’t be what you had in mind. The problem with bleaching at home isn’t just that it’s technically difficult (it is) — it’s that over-the-counter bleach is both less powerful and less sophisticated than what professionals use. The window between “not light enough” and “seriously damaged” is narrower than it looks, and there’s no fixing a botched bleach job quickly. If you’re determined to go lighter, a semi-permanent gloss is a smarter starting point. Glosses are sheer, translucent, and designed to refresh and brighten your existing color rather than dramatically alter it. They’re also remarkably effective at evening out patchiness, adding shine, and making color that’s grown dull look fresh again — all without the commitment or the risk. Tools You’ll Actually Need Most box dye kits include gloves and a developer. Some include an applicator bottle or brush. Before you assume you have everything, check
The All-Day DIY Facial: How to Give Your Skin a Full Reset in 10 Hours

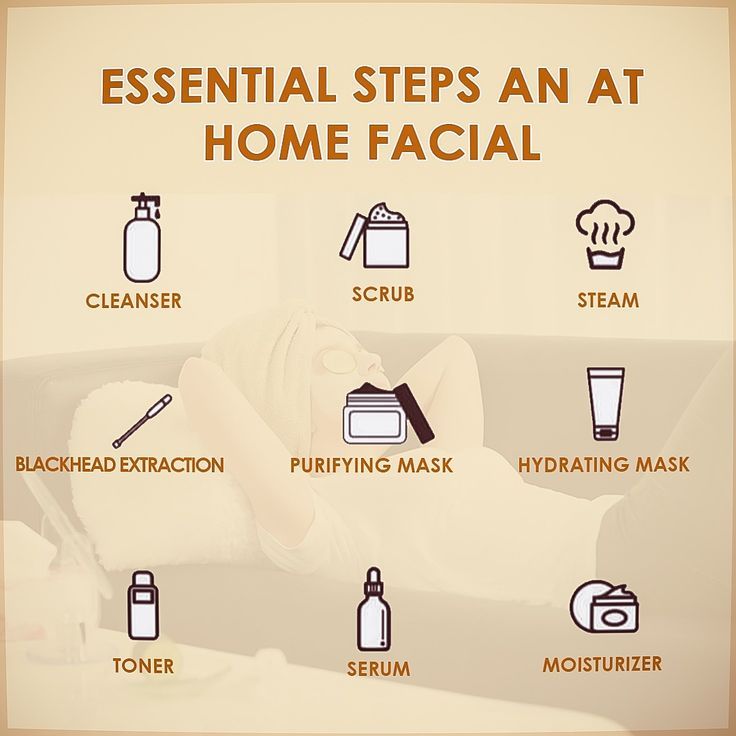
“Self-care” has become one of those phrases that means everything and nothing at the same time. A bath bomb counts. So does turning your phone off for twenty minutes. But what if you took the concept seriously — embarrassingly, aggressively, all-day seriously? What if you devoted an entire Saturday to your face? That’s exactly what this guide is about. Not a quick 30-minute mask situation. A full, phased, borderline obsessive 10-hour DIY facial that covers every step a professional esthetician would hit — cleanse, purge, exfoliate, treat, and hydrate — spread across an entire day at home. Fair warning: this is a commitment. But your skin at the end of it? Worth every hour. How the Day Breaks Down Before we get into it, here’s the architecture of the whole thing: Phase Focus Duration Act 1 Deep Cleanse 1 hour Act 2 Exfoliate & Purge 1.5 hours Act 3 Recharge & Hydrate 7.5 hours Total 10 hours The logic is simple: most skincare routines are rushed. You cleanse for a minute, slap something on, and leave. This protocol gives each step the actual time it needs to work. The result isn’t just clean skin — it’s a full reset. Act 1: The Deep Cleanse (1 Hour) Every great skincare session starts with one thing: heat. Steam your face over a bowl of boiling water for about 10 minutes before you do anything else. If you have an essential oil on hand — tea tree, eucalyptus, lavender — add a few drops. It smells good, and the antimicrobial properties don’t hurt. The steam opens up your pores, softens whatever’s sitting in them, and makes everything that comes after significantly more effective. From there, move into a proper double cleanse. If you’re not doing this already, this is the single habit most worth adopting from today’s session. Step 1 — Oil cleanser or balm: Massage a cleansing oil or balm over dry skin for a full two minutes. This step lifts oil-based impurities — sunscreen, sebum, makeup — that water-based cleansers simply can’t break down. Rinse thoroughly. Step 2 — Cream or gel cleanser: Follow immediately with a gentle cream or gel cleanser on damp skin. This clears the water-soluble residue the oil cleanser left behind. Rinse with lukewarm water, not hot — hot water strips your barrier. After cleansing, if you have access to a facial LED device, now is the time to use it. Red light targets inflammation and redness. Blue light hits acne-causing bacteria. Even a consumer-grade mask at 10 minutes makes a noticeable difference over consistent use, and it forces you to sit still and do nothing — which, honestly, is the point of today. Pat dry. Gently. Act 2: The Exfoliation & Purge (1.5 Hours) This is the most intense phase and the one most people skip in their regular routines because it takes patience and, occasionally, some discomfort. Toning first. Before any exfoliant, sweep on a gentle AHA toner — glycolic or lactic acid. This primes the surface for what comes next, loosening the outermost dead skin cells so your exfoliant can work more efficiently. Leave it on for a few minutes. Physical exfoliant, then chemical. The order matters here. A physical exfoliant — something with a mild grain or texture — does surface-level work: smoothing, brightening, improving immediate texture. Use circular motions, light pressure, 60 seconds maximum. Rinse completely. Then comes the chemical exfoliant, and this is where things get real. A proper AHA/BHA peel — the kind that tingles, then burns mildly, then makes you question your choices — breaks down the bonds between dead skin cells at a deeper level than any scrub can reach. Follow the instructions exactly, including the neutralizing step if your product requires one. Don’t freestyle this. After the peel, your skin will look temporarily red and feel almost uncomfortably sensitive. That is normal. That is the process. What follows is the part nobody talks about enough: Extractions. With your skin freshly softened and pores open, this is the optimal moment. Use a proper extraction tool — never your bare fingers — and work gently. Minimal pressure. You should barely have to push. If something isn’t coming out easily, leave it. Forcing a blockage tears skin and causes post-inflammatory marks that take weeks to fade. Finish this phase with a soothing, calming mask. Something with centella, oat, or aloe. Your skin has just been through something, and the mask is the cool-down lap. Leave it on for the full recommended time. Lie down if you can. Act 3: The Recharge & Hydration Marathon (7.5 Hours) Here’s where most people would stop. They’d apply a moisturizer, feel virtuous, and call it done. But the thing about hydration is that it’s cumulative — each layer seals in and amplifies the one before it. So this phase is about layering, patiently, over hours. Immediately after the mask: Start with an essence or hydrating toner. Pat — don’t rub — into skin until fully absorbed. This first layer is the foundation. Everything you put on after it sits better because of it. 30 minutes later: A lightweight serum — hyaluronic acid, niacinamide, or vitamin C depending on your skin goals. Apply to slightly damp skin for better absorption. 1 hour later: A heavier moisturizer. Cream consistency, not gel. This is the layer that does the long-term work. Before bed: The final and most important layer: a sleeping mask or overnight cream. This is where the real transformation happens — applied right before sleep, working for 7–8 hours while your skin’s natural renewal cycle kicks into high gear. Apply generously. You’re not going anywhere. Under-eye patches at some point in the evening are a nice addition if that area is a concern. The undereye skin is thinner and loses hydration faster than anywhere else on the face. Even 15 minutes of patches — collagen, peptide, or hyaluronic-based — makes a visible difference by morning. The Honest Results By the time you wake up